Easy Sourdough Bread Recipe for Beginners
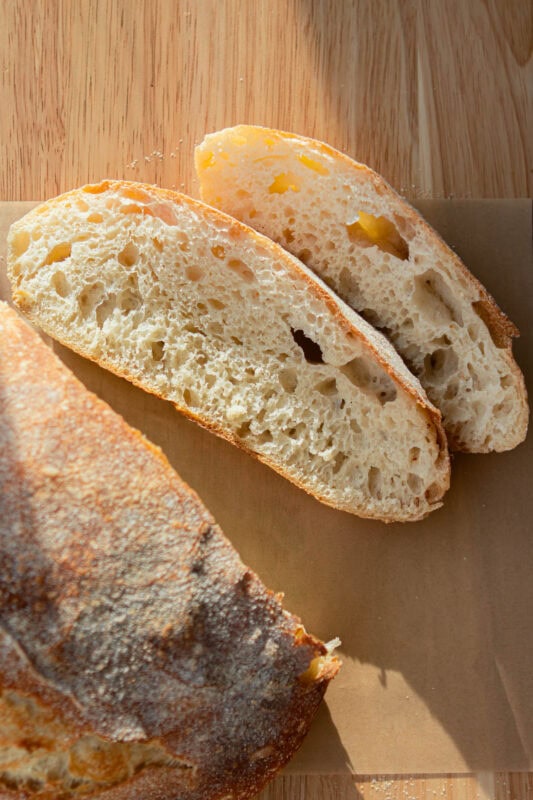
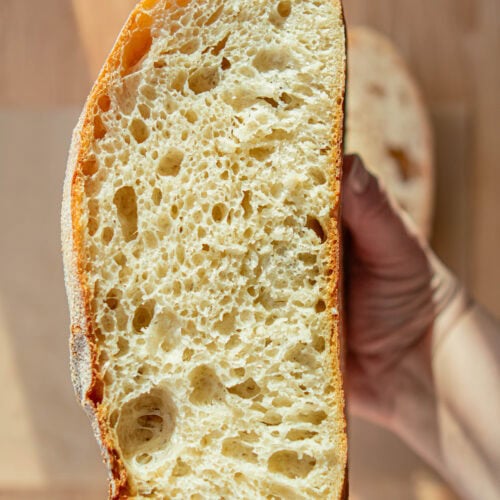
This sourdough loaf is what I consider the most ideal loaf. A thin, crisp crust with blisters, soft, pillow-y interior that is slightly moist but not dense. It toasts up beautifully and can be used for sandwiches or eaten alone with butter!

Remember about 6 years ago now, we were quarantined, and everyone wanted to learn how to make sourdough? Well, I was one of them… but there was a mental block that wouldn’t allow me to perfect a loaf. I tried and gave up a few times over the years then I finally came to the realization- it doesn’t have to be so difficult! Everyone makes everything so unnecessarily complex- cast iron, stainless steel cookware, SOURDOUGH, etc. It’s almost as if the world is against being simple. It once was simple, we can get back there again, right? We’ll go step-by-step to figure out how to make your best loaf yet!
Tips for baking this sourdough loaf:
Water = No Sticky Dough– Wet hands work better than extra flour when handling this dough. The dough absorbs the flour and causes it to be dense.
Keep the Dough Hydrated– If it feels too tight early on, a small splash of water can be worked in.
Do Not Overpoof– At this high(er) hydration level, it’s better to stop the rise a little early than too late.
How to make this sourdough loaf step-by-step:
Add the 385 grams water, 110 grams starter, and 500 grams flour to a large bowl and mix until everything is combined and no dry spots remain. Sprinkle the salt over the dough and work it in with your hands until it’s evenly distributed. The dough will be sticky at this point — that’s normal.

Cover the bowl and let the dough rest at room temperature. Over the next couple of hours, perform several rounds of stretch and folds, spacing them about 20–30 minutes apart. Each time, the dough should feel smoother and more elastic than before.

Once the folds are finished, let the dough continue rising on its own. It’s ready to move on when it looks puffed, shows bubbles along the surface, and jiggles slightly when you move the bowl. This usually takes about 4–5 hours total, depending on your kitchen.

Turn the dough out onto a lightly floured surface and gently form it into a round. Let it rest for 20–30 minutes, then shape it into a tighter loaf. Place it seam-side up into a floured banneton or towel-lined bowl. Cover and refrigerate overnight, anywhere from 12 to 18 hours.

Preheat your oven with a Dutch oven inside to 475°F. Turn the cold dough out onto parchment, score the top, and carefully transfer it to the hot pot.

Preheat your oven with a Dutch oven inside to 475°F. Turn the cold dough out onto parchment, score the top, and carefully transfer it to the hot pot.

Bake covered for 20 minutes, then remove the lid, lower the temperature to 450°F, and bake for another 20–25 minutes until the crust is deeply golden. Let the loaf cool completely before slicing.
Easy Sourdough Bread Recipe for Beginners
Ingredients

Method
- Add the water, starter, and flour to a large bowl and mix until everything is combined and no dry spots remain. Sprinkle the salt over the dough and work it in with your hands until it’s evenly distributed. The dough will be sticky at this point — that’s normal.
- Cover the bowl and let the dough rest at room temperature. Over the next couple of hours, perform several rounds of stretch and folds, spacing them about 20–30 minutes apart. Each time, the dough should feel smoother and more elastic than before.
- Once the folds are finished, let the dough continue rising on its own. It’s ready to move on when it looks puffed, shows bubbles along the surface, and jiggles slightly when you move the bowl. This usually takes about 4–5 hours total, depending on your kitchen.
- Turn the dough out onto a lightly floured surface and gently form it into a round. Let it rest for 20–30 minutes, then shape it into a tighter loaf. Dust the non-seamed side with rice flour (rice flour doesn’t absorb into the dough and it doesn’t stick) Place the dough seam-side up into a floured banneton or cotton towel-lined bowl.
- Cover and refrigerate overnight, anywhere from 12 to 18 hours. Proofing in the fridge overnight creates the beautiful blisters on the crust.
- Preheat your oven with the Dutch oven inside from cold to 475°F. Turn the cold dough out onto parchment, score the top, and carefully transfer it to the hot pot.
- Bake covered for 20 minutes, then remove the lid, lower the temperature to 450°F, and bake for another 20–25 minutes until the crust is deeply golden.
- This may be the hardest but most important step. Let the loaf cool completely before slicing. If it is sliced too early, it will become dense and gummy.
Tried this recipe?
Let us know how it was!